
Tattooing is an art form that has been practiced for centuries across various cultures worldwide. With the evolution of tattooing techniques, materials, and tools, the process has become more sophisticated, allowing for intricate designs and vibrant colors. One of the essential tools in a tattoo artist’s kit is tattoo transfer paper. This guide will delve into the nuances of how to use tattoo transfer paper, ensuring your next tattoo session is seamless.
What is Tattoo Transfer Paper?
Tattoo transfer paper is a specialized type of paper used in the tattooing process to transfer a design from paper to skin. It consists of several layers, including a thin sheet of paper coated with a layer of dye or ink and a layer of transfer gel or wax. The purpose of tattoo transfer paper is to provide a clear, accurate stencil of the tattoo design on the skin before the actual tattooing begins. This ensures the tattoo artist can follow the design precisely, resulting in a perfect replication of the intended artwork.
Understanding the components and functionality of tattoo transfer paper is crucial for both seasoned tattoo artists and novices. It’s the bridge between conceptualizing a design and bringing it to life on the skin. By mastering the use of this tool, artists can elevate the precision of their work, ensuring satisfaction for both themselves and their clients.
Read More Articles: Best Tattoo Gun for Beginners
Why Use Tattoo Transfer Paper?
The significance of using tattoo transfer paper cannot be overstated. Firstly, it allows for the accurate transfer of complex designs, ensuring every detail is captured perfectly on the skin. This is especially important for intricate patterns or texts that require precision. Secondly, it reduces the chances of mistakes during the tattooing process. By having a clear guide to follow, the likelihood of errors is minimized, saving time and reducing the need for corrections or cover-ups. Lastly, it enhances the overall efficiency of the tattooing process. By spending less time on freehand drawing directly on the skin, artists can focus more on the tattooing itself, leading to better results and a more pleasant experience for the client.
The decision to incorporate tattoo transfer paper into the tattooing process is a testament to an artist’s commitment to quality, precision, and client satisfaction. It reflects a meticulous approach to the craft of tattooing, ensuring every piece is a masterpiece.
How to Use Tattoo Transfer Paper: A Step-by-Step Guide
Step 1: Prepare the Design and Materials
Before diving into the tattooing process, the first step is to prepare your design and gather all necessary materials. Start by finalizing the tattoo design, ensuring it’s exactly as desired. This design should then be traced or printed directly onto the tattoo transfer paper. It’s crucial to use a high-quality printer or a steady hand to ensure the design is accurately replicated on the paper.
Next, assemble all materials needed for the transfer process. This includes the tattoo transfer paper, a pair of scissors, a cleansing solution for the skin, tattoo transfer gel, and any other items you may require. Having everything organized and within reach streamlines the process, making the subsequent steps more efficient.
The preparation phase is foundational to the success of the tattoo. Taking the time to meticulously prepare your design and materials sets the stage for a smooth tattoo session, ensuring all focus can be on executing the tattoo to perfection.
Step 2: Clean and Prep the Skin
Once the design and materials are ready, the next step is to prepare the client’s skin. Begin by thoroughly cleansing the area where the tattoo will be applied. Use a gentle, antimicrobial soap to remove any dirt, oil, or makeup, ensuring the skin is clean and free of any contaminants. After washing, dry the area completely with a clean towel.
The next phase of skin preparation involves ensuring the skin is in the best possible condition for receiving the tattoo. If necessary, shave the area to remove any hair that could interfere with the transfer process. Once shaved, cleanse the skin once more to ensure it’s completely free of any hair or debris.
Preparing the skin properly is crucial for the success of the tattoo transfer. Clean, smooth skin ensures the transfer paper adheres correctly and the design transfers clearly, setting the foundation for a successful tattoo application.
Step 3: Cut the Tattoo Transfer Paper to Size
With the skin prepped and ready, turn your attention back to the tattoo transfer paper. Lay the paper flat and carefully cut out the design, leaving a small margin around the edges. This margin helps in handling the paper and ensures the entire design transfers without any missing parts.
Cutting the paper to the correct size is more than a trivial step; it’s about ensuring the design fits perfectly on the intended area of the skin. Too large, and it may not sit well, too small, and parts of the design may be lost. Take your time with this step, as precision here can significantly impact the final outcome.
The act of trimming the tattoo transfer paper to size is a blend of art and precision. It requires a careful eye and a steady hand, underscoring the meticulous nature of tattooing.
Step 4: Apply the Tattoo Transfer Gel
Before applying the tattoo transfer paper to the skin, a special gel must be used. This gel, often referred to as stencil gel, helps the design transfer smoothly and stay in place on the skin. Apply a thin layer of the gel over the area where the tattoo will be placed. Ensure the gel is spread evenly and covers the entire area the tattoo will occupy.
The application of transfer gel is a critical step in the process. The gel not only facilitates the transfer but also acts as a protective barrier for the skin, reducing irritation. It’s important to use a sufficient amount, as too little may result in an incomplete transfer, while too much can cause the design to blur.
This step is a testament to the importance of every detail in the tattooing process. Each action, from the application of the gel to its even distribution, is carried out with precision and care, ensuring the best possible foundation for the tattoo design.
Step 5: Place the Tattoo Transfer Paper on the Skin
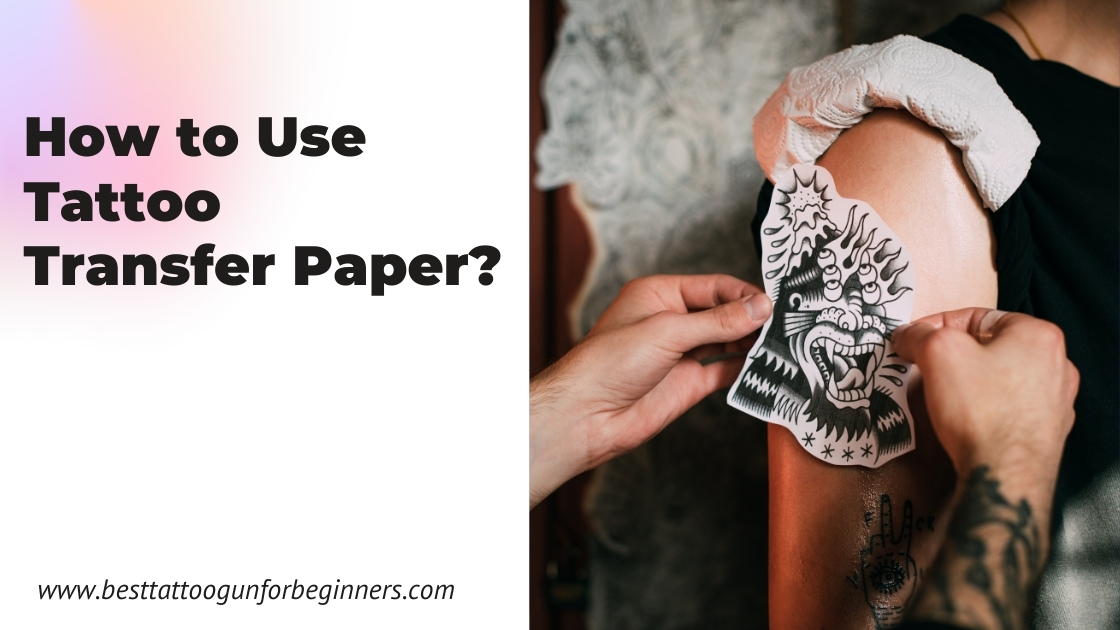
Now comes the moment of truth—transferring the design onto the skin. Carefully position the tattoo transfer paper, design side down, on the prepped and gelled skin. Ensure it’s correctly aligned and positioned exactly where the tattoo is intended to be.
Once in place, gently press down on the paper, smoothing out any bubbles or wrinkles that may interfere with the transfer. It’s essential to handle the paper delicately to avoid smudging the design.
The placement of the tattoo transfer paper is a delicate balance between precision and gentleness. It’s the critical juncture where the envisioned design begins its journey from concept to reality, marking a significant moment in the tattooing process.
Step 6: Apply Pressure and Remove the Paper
With the tattoo transfer paper firmly in place, apply steady, even pressure over the entire surface of the paper. This ensures every part of the design makes contact with the gel-coated skin and transfers effectively. After a few moments, carefully peel away the paper, starting from one corner and slowly moving to the opposite side.
The reveal is always a moment filled with anticipation. As the paper is removed, the transferred design emerges, marking the skin with a blueprint for the tattoo. This step requires a mix of patience and precision, as rushing can lead to a partial or smudged transfer.
The successful transfer of the design is a testament to the effectiveness of the tattoo transfer paper and the care taken in each preceding step. It sets the stage for the actual tattooing to begin, with the artist now having a clear guide to follow.
Step 7: Final Touches and Aftercare
After the design has been successfully transferred, examine it closely for any imperfections or missing details. If necessary, use a skin-safe marking pen to correct any issues. This is also the time to discuss the transferred design with the client, ensuring it meets their expectations before proceeding.
Once the tattooing process is complete, aftercare becomes the priority. Provide the client with detailed aftercare instructions, emphasizing the importance of keeping the tattoo clean and moisturized. Proper aftercare is crucial for the healing process and ensures the longevity and vibrancy of the tattoo.
The final touches and aftercare phase is about ensuring the tattoo not only looks great when it’s done but also heals properly, maintaining its beauty over time. It’s a reminder of the enduring nature of tattoos and the importance of care in every step of the process.
Troubleshooting Tips for Using Tattoo Transfer Paper
Even with careful preparation and execution, issues can arise when using tattoo transfer paper. If the design doesn’t transfer clearly or completely, check the skin’s preparation and ensure it was clean and properly gelled. It may also help to apply slightly more pressure when transferring the design or to use a fresh piece of transfer paper if the first attempt was unsuccessful.
Another common issue is the design smudging during transfer. This can often be prevented by ensuring the skin is not overly moist with transfer gel and by peeling the paper off slowly and carefully. If smudging occurs, gently clean the area and try the transfer again with a new piece of paper.
Troubleshooting is an integral part of mastering how to use tattoo transfer paper. Each challenge presents an opportunity to refine the process, ensuring smoother, more successful transfers in the future.
Safety Precautions When Using Tattoo Transfer Paper
Safety is paramount in all aspects of tattooing, including when using tattoo transfer paper. Always use professional-grade, skin-safe transfer paper and gel. Ensure the client’s skin is properly prepped and that any allergies or sensitivities to the materials used are addressed beforehand.
Additionally, maintain a clean, sterile work environment to prevent contamination or infection. This includes using disposable gloves and sterilizing all non-disposable tools before and after the tattooing process.
Adhering to safety precautions not only protects the client but also enhances the overall tattooing experience, ensuring it’s both positive and healthy.
Conclusion
Mastering how to use tattoo transfer paper is a skill that elevates the tattooing process, ensuring precision, efficiency, and satisfaction. By following the detailed steps outlined in this guide, from preparation to aftercare, tattoo artists can perfect their craft, delivering stunning, accurate tattoos every time.
The journey from a concept to a fully realized tattoo is complex, requiring skill, patience, and attention to detail. Tattoo transfer paper is a vital tool in this journey, bridging the gap between imagination and reality. By mastering its use, artists not only ensure the success of their work but also honor the trust placed in them by their clients.
In the world of tattooing, every detail matters. From the initial design to the final aftercare instructions, each step is a testament to the artistry and dedication of the tattoo artist. Using tattoo transfer paper is a practice that underscores this commitment, ensuring each tattoo is a masterpiece to be proud of.